Restoration, Fabric Replacement
& Polishing of
Sterling Silver Picture Frames

These sterling silver chased, repoussé and pierced picture frames have been beautifully restored. The silver was polished and it has completely new blue velvet fabric covering the original carved wood foundation. In the following pages, you will see just a few steps in the approximately 12-hour process to restore each frame.
This is what would qualify as a restoration. I reused the original carved wood forms and original hinges. No compressed cardboard or time-saving alternatives were used to restore these frames. These frames were over 100 years old and passed down through generations. A quality restoration will be enjoyed for years into the future.
Comparison Before and After Restoration

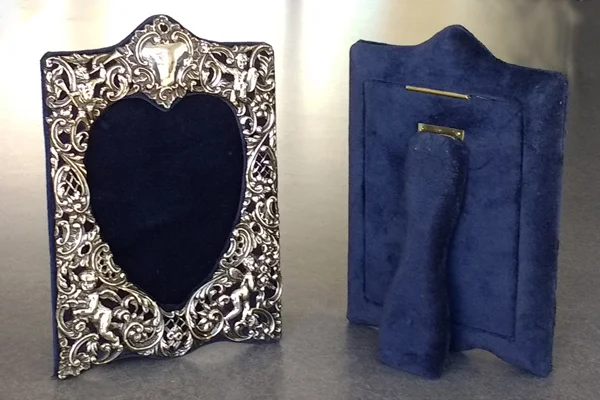
Left photo shows condition of sterling silver frame before restoration. Right photo after new fabric and polishing of sterling silver frame.
Original condition


Sterling silver frames tarnished with 100-year-old fabric
These two matching sterling silver frames arrived dull and tarnished (left photo.) The fabric beneath the silver was so dirty and discolored you could not even tell that it was blue velvet. Looking at the right photo, the blue velvet fabric on the back was so worn that it was threadbare down to cloth with no velvet plush remaining.
Taking apart the picture frame


Removing the original sterling silver frame
The first step is to remove the sterling silver chased, repoussé, and pierced frame. It is held in place by tiny silver nails. After the silver is removed you can see how dirty and faded the original fabric had become where it was exposed. Underneath the silver, it was still plush blue velvet (right photo).

Side-by-side comparison of the Sterling silver picture frame and original fabric
This photo shows a side-by-side comparison of the sterling silver picture frame next to the original fabric-covered wood frame.

removing the fabric from the back panel
In the two photos above, you can see the fabric as it is removed from the center back panel. The left photo shows the beginning of removing the fabric. As soon as I touched the 100-year-old fabric it would practically disintegrate, peeling off in bits and pieces.

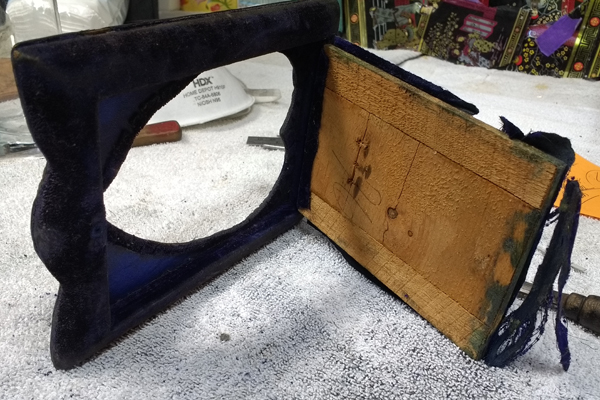
The picture frame was two panels
The front of the picture frame was two panels of wood. A carved wood front panel covered in fabric, and a back panel. The two layers were covered in fabric separately, hence the seam you can see on the side (left photo.) The goal is to slip a small knife between the front and back layers and carefully pry apart the front from the back. (right photo top.)
Below you can see the front wood and back wood of the frame with the original fabric still attached.


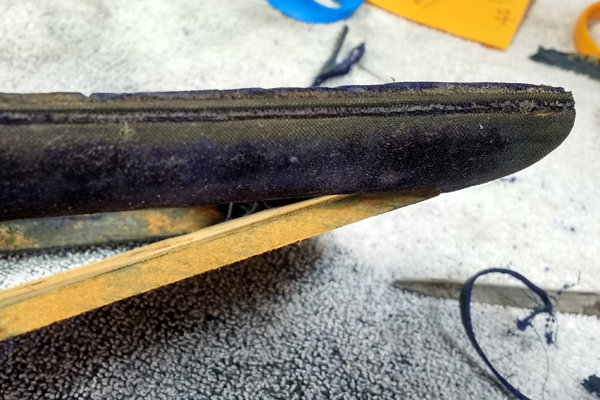
original velvet wrapped around the front and back panels was glued on
The velvet was wrapped around the front wood and back wood panels. By separately wrapping the front and back panels with fabric the cutting and trimming could be sandwiched in between and completely concealed.


Removing fabric from the wooden back panel of the frame
Removing the fabric from the wood was a messy process. Originally the fabric was folded over the wooden edge and glued down. The fabric was very brittle and broke into bits of crispy blue fragments. (It did not peel off in one piece.) This is why you see bits of fabric in the left photo. In the final step, I had to scrape off the old glue and fabric from the wood. The hinge was cleaned with a small brass brush.


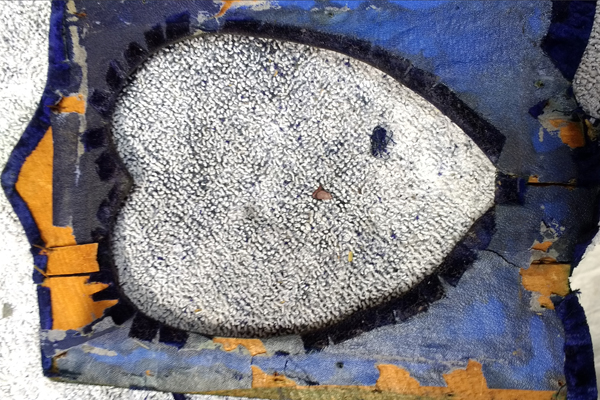
rEMOVING FABRIC FROM THE WOOD FRONT OF THE PICTURE FRAME
The fabric had to be carefully removed from the carved wooden form. As you can see in the photo, the original 100-year-old fabric was so fragile and brittle that it would fall apart. I think the green color of the wood is either the dye from the fabric (bleeding into the wood,) or the color of the original glue. Before applying the new fabric I had to scrape off all the old glue.


Wood repair of the frame was also needed
One of the wooden frames was in bad shape. The wood panel in the front was broken in several places. This became immediately apparent when I was removing the fabric (left photo.) In addition, the back panel had a small knot hole that needed to be filled with wood and glued into place (right photo.)
Applying new Fabric to the wood form

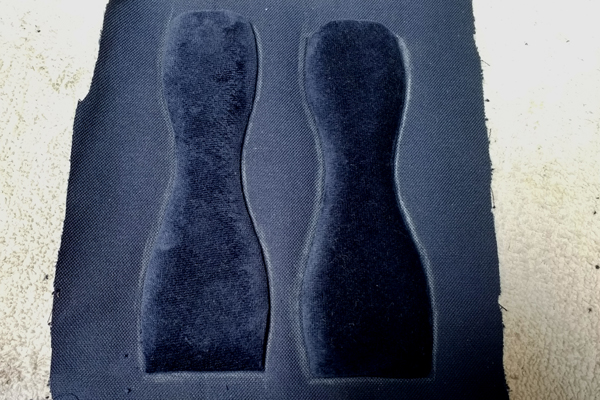
Covering the easel stand of the picture frame with fabric
Covering the easel stand with new fabric took several steps. After removing the old fabric and scraping off the old glue, the new fabric was wrapped around the carved wood. Cutting the fabric close to the wood with little scissors allowed the new blue velvet fabric to stretch around the curved wooded form (left photo). The hardest part was to create a perfect silhouette of fabric that would cover the flat back of the easel.

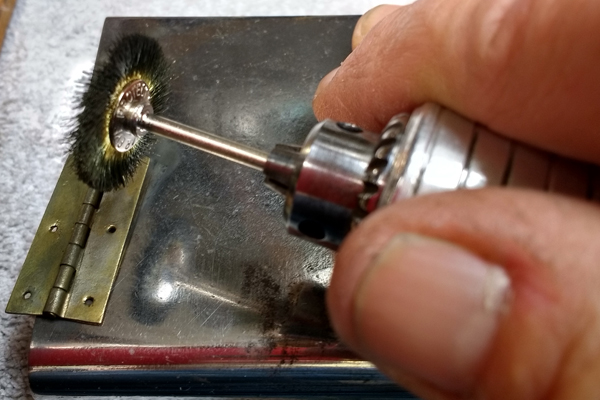
Original hinge for the easel
I am committed to reusing all the original parts from the frame. After taking off the fabric, I also removed the hinge so that I could reassemble the frame in better condition. The original hinge was bent, discolored, and scummy with old glue and dirt. A small one-inch brass brush cleaned up the hinge so it looked much better. (There are no replacement parts to purchase. Every part must be repaired or restored for reuse.)
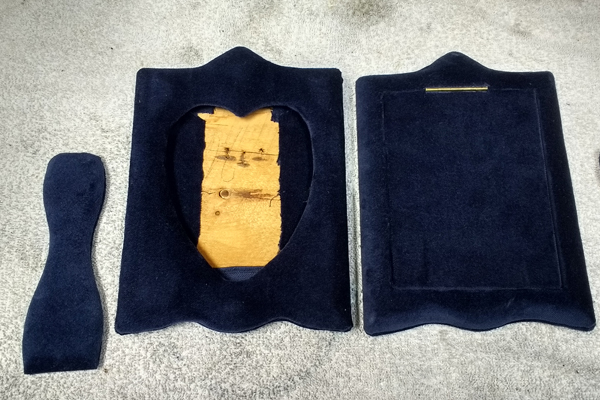
Covering the wooden forms with new blue velvet
Covering the wooden forms with new fabric required a lot of my sewing skills. There were five parts. In this photo (above), everything is coming together and ready for final assembly. The easel stand (far left), the front (two pieces - center), the back frame, and the hinged back panel (right).


Sterling silver details
Look between my thumb and index finger in the left photo. This is the head of a tiny, tiny sterling silver nail used to hold on the sterling silver frame in place. I polished the head of each nail (hence the dirty fingers). These sterling silver nails are not replaceable. They are not available for purchase. If your frame is missing sterling silver nails, they have to be handmade by me. New sterling silver nails take time, a lot of time.
I also made a new sterling loop for the back (in case the client wants to hang this sterling picture frame on the wall.) It was screwed in with tiny stainless steel screws which are more secure than nails. This replaced the rusty steel wire that was originally on the back.


FINAL RESTORATION OPTIONS
The left photo shows the front and back of the sterling silver frame. The sterling silver is polished and nailed into place. The wooden support is covered in completely new fabric. The right photo shows a small sterling silver loop at the top of the frame for wall hanging, and the fabric loop to prevent the easel from sliding open. Originally this sterling frame did not have a loop or fabric ribbon to stop the easel from sliding open. Sitting on a smooth tablecloth this easel loop would be necessary. Sitting on a crochet doily, the loop for the easel would not be necessary, but most modern homes do not usually have lace tablecloths or doilies on the table.