
Sterling Silver Picture Frame Fabric Replaced/ Restored

Detail of sterling silver frame
This antique sterling silver picture frame arrived with the fabric faded & worn. The pierced details in the sterling silver frame are filled with old dirt and silver polish crud.
picture frame fabric faded & worn
This photo shows the back of the picture frame. The cotton velvet is faded and so worn around the edges that the velvet surface is worn down to the threadbare fabric.

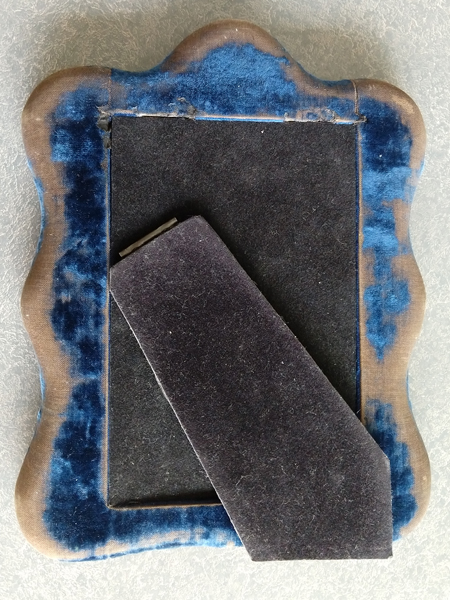
Taking apart fabric and wood backing of sterling silver frame
The support for antique sterling silver frames is a two-part wood core originally covered in velveteen fabric. Without the sterling silver frame, you can see the fabric (right) is faded, worn and dirty where the sterling silver frame had pierced holes.
Removing old velvet fabric


Scraping off the fabric is very time-consuming
Scraping off the fabric from the wood frame takes time and patience. The fabric is brittle and breaks into fine particles. It does not pull off in large pieces. For this frame, the fabric was very difficult to remove as it was very well attached with old glue. An additional level of concern is that the wood backing is always very soft wood or composite materials. Careful scraping of the wood with a knife is the only option.

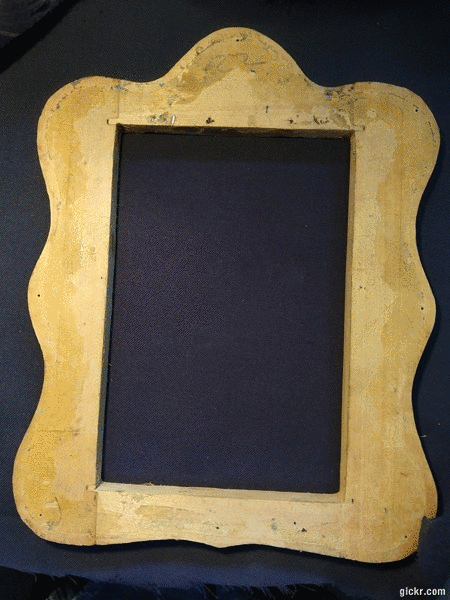
Scrapping off the fabric from the wood frame
The fabric needs to be scrapped off very carefully to preserve the soft wooden core. Very often when the old fabric is removed the wooden frame falls apart which is exactly what you see here.


After the frame is scraped (left image), it is glued back together (right image).

Fabric scraped from the cardboard wooden front
The front of the picture frame core required extra care. Instead of wood, this frame was constructed with a cardboard composite material. Notice how the fabric is broken into small fragments and brittle fabric particles.
Replacing Velvet Fabric
Applying the Cotton Velvet Frame
Applying the cotton velvet fabric takes time because care and attention to every detail are important for this to look good in the end.
The animation to the left represents hours and hours of work. If you aren’t familiar with sewing and fabric work, don’t even give this a try.
The fabric is stretched over the wooden core, one little bit at a time, and glued down. I do not like to use too much glue as I don’t want the glue to saturate the fabric.

Front & back of original wood/cardboard core covered in velvet fabric.

Fabric covered front and back wood core ready to assemble

Front and back are Glued together with just a little glue.

Manufactured easel made from foam core and plastic
The sterling silver frame had the original wooden core but the original wooden easel was replaced (before it arrived at my studio) with newly manufactured plastic and foam core. (This is a piece of junk. It looks O.K. but doesn’t look authentic to the frame.)

Manufactured easel covered with new velvet to match.
I covered the manufactured easel with matching velvet (which was really hard to do.) It looks nice, but it would have been much better to have the original wooden easel. If you have an antique frame don’t throw away the original parts even if the fabric is worn.
Polishing a Sterling Silver Frame


Polishing the sterling silver frame with a small buff
Polishing the sterling silver frame is done very carefully with a small buff and polishing compound. This takes time but it is a conservative approach to protect this delicate pierced design and allows me to polish every detail.
Final assembly

Final Assembly
Antique sterling silver frames are held onto the wood core with small sterling silver nails. Unfortunately, this frame arrived with none of the sterling silver nails. The silver pierced frame was glued to the fabric (which is not the way this is supposed to be held together). When I made small nails, the wooded core was so chewed up inside that the nails wouldn’t stay in tightly. Nuts! The solution was to use a few very tiny 1/8” stainless steel wood screws. Screws are not my first choice, but most people will never notice.
For more examples of repair and restoration of sterling silver frames CLICK HERE.